


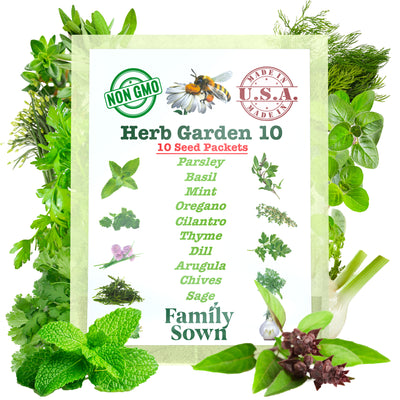


Microgreens
Microgreens

Microgreens
Instructions for Planting Microgreens
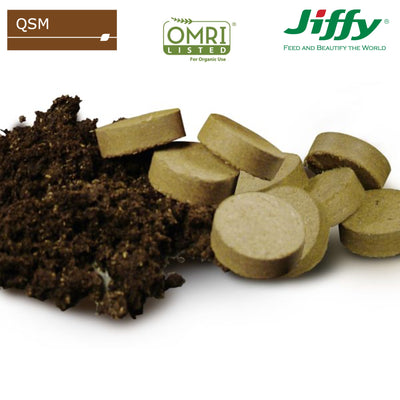
We recommend using dehydrated peat disks, but you can follow the same instructions for other soil types. Skip to step 2 if you're using hydroponics.
Step I:
Prepare your soil
For peat disks, add 2oz of water for every disk.
• Allow the disks to absorb all of the water (about 10 minutes).
• Break up and mix the soil with your hands. Any remaining water should be soaked up by dryer portions of the soil.
For Soil, simply make sure the soil is failrly well saturated. You don't want standing water, but you want the soil to be wet.
• Lightly press the soil with the bottom of the second empty container to create a uniform flat surface. Don’t compress the soil. You’re just trying to create a flat surface so you can evenly spread your seeds. If the surface isn’t flag, the seeds will collect in the low spots and you’ll end up with clusters.
Step 2:
Plant your seeds:
• Evenly spread all of the seeds across the entire surface. Do not sow the seeds or cover them with soil. Simply spread them on the top so they are evenly distributed. Spread any clusters with your fingers as best you can.
• Place a 2nd empty container directly on top of the seeds. Place a large book or something flat and heavy in the empty container. Something that weighs ~1 lb is sufficient. Some professional growers use a cinder block, so don’t worry about your weight being too heavy. Also, they will grow with no weight, but a little weight makes them struggle a little, which will result in stronger plants.
Step 3:
Total Darkness for 3 days
• Set them aside for 3 days and don’t mess with them. You want them to be in total darkness as if they were underground.
• Germinate should occur at temperatures of 50 degrees or more, so you should be able to place them anywhere inside your home and they will do just fine.
• Check on them after three days. You should see a lot of germination going on. They should be fuzzy white and/or trying to sprout. Some of the sprouts near the edges might have gotten a little light and might have some green, but the majority should not have green leaves yet. If the majority of your seeds haven’t started to germinate yet, mist them with the spray bottle and replace the cover and weight for another day. You want consistent, even germination across the entire surface are before proceeding to the next step.
Step 4:
7 Days of Light
Place them in a windowsill and watch them grow for 5-7 days.
• Microgreens don’t need tons of light. A good sunny window should be plenty. Alternatively, you can place them under a grow light for similar results.
• They will grow towards the light. If you rotate them every day you’ll get more consistent growth over the whole box.
• Lightly mist everyday with a spray bottle.
• Stick your finger in the corner of the soil. If it feels dry, spray a little more generously. You should not need to add any water, but use your best judgement if the soil seems to dry to you.
Step 5:
Harvest
• Harvest when sprouts are 2-3 inches tall, or
o when true leaves start to appear on some sprouts, or
o When some sprouts start to fall over
• Cut sprouts with a sharp knife, scissors or shears
• Cut just high enough to exclude any soil from your harvest.
Step 6:
Eat
• You can rinse them before you eat them, but it’s probably not necessary. Unless you strayed from these directions, you grew your microgreens in organic soil with no fertilizer and no pesticides. You should be able to eat them as soon as you cut them. When I serve them to friends, I like to cut them at the table and put them directly on everyone’s plate; literally farm to table.
• They will keep in the refrigerator for several days (like lettuce or other green vegetables). It's better to harvest them when they're ready and refrigerate them then to leave them growing too long. They will not do very well once the nutrients in the seeds have been exhausted. Also, the flavor profile will change (they won't taste as good).
More about Microgreens:
A seed is very similar to an egg. A tiny plant embryo is alive inside the seed. Surrounding the embryo are nutrients to help it start to grow and it’s enclosed in a protective shell (the hull). When external stimuli (heat, moisture, pressure, etc.) trigger germination, the embryo will begin to consume it’s nutrients and grow, eventually cracking the hull and beginning to grow up towards the sky. Most seedlings start with two small round leaves that look very similar across all species. Once they srpout, the little plant will draw all the nutrients it needs from it’s seed. However, this will only last for about a week. Once the resources in the seed have been exhausted, the plant will need to get nutrients from it’s environment (e.g. soil, air, etc.). If it’s in a good environment, it will sprout true leaves that look like small leaves of the mature plant, and it will continue to grow. Microgreens should be harvested at or before the point where true leaves appear.
Because microgreens get the vast majority of their nutrients from their seed, they can be grown in concentrations that are not sustainable for growing plants to maturity. At this early stage, the plant has extremely high concentrations of nutrients and flavor, which makes microgreens nutritious and delicious. However, if you don’t harvest your microgreens when the nutrients from their seeds have been exhausted, they will quickly wither and die.
Because microgreens get all their nutrients from their seeds, you don’t need to plant them in nutrient rich soil or use fertilizer. I grow my microgreens in peat, which holds water well, is non toxic and contains no manure (manure based fertilizer is extremely common). You could eat peat if you wanted to (not recommended). Also, the lifecycle of microgreens is so short you typically don’t need to worry about pests or disease, so pesticides and other chemicals are of no benefit. Washing produce is always good practice, but I don’t wash my microgreens. The only thing they have been exposed to is water, peat and air. You could not get more organic than that. I eat mine strait out of the tray. Actually, I like to bring the tray to the table so I can cut them and put them directly onto serving plates at dinner parties. You can’t get more fresh than that! My guests love it.
A cheap and easy medium for grwoing microgreens is in a paper "to-go" container. Family Sown recommends using a compostable recycled paper container. The liner is not polymer and contains no microplastics. When you’re done, you can throw the container and the soil into you’re compost bin or bury it for a 0 waste project.
You’re going to add 1 quart of water to the soil mix in step 1. That should be all the water you need. However, slight variations in the external climate might lead to accelerated evaporation. If it’s rainy and humid outside, you might not need to add any water. If it’s hot and dry, the air might pull more water out of your microgreens and adding a little water might be necessary. Use a spray bottle to give them a good mist if they look a little dry. It will be tough for you to overwater them with a spray bottle.


